Sunday, November 15, 2009

Introducing... A La Card!

Boy, am I glad to see you today! I am so excited to share with you a new video series I've begun titled, "A La Card". Usually, my video tutorial sets include two segments, a part 1 and a part 2, which means twice the length and twice the amount of work. Because these tutorials take so long to complete, there may be days or weeks between tutorials...I am told by some of you that this is just far too long and that you need a fix in between,hence.."A La Card".

The "A La Card" series includes single segment videos and projects which can be completed quickly and require minimal technical instruction to accomplish. I am most excited about this series because of the introduction I have created for them, featured at the beginning of each video. I was thinking about this series being on the side, or A LA CARTE, and teh idea of a tiny paper morsel came to mind and I ran with it from there. I hope you can enjoy my silly humor as each video opens with a heaping serving of vintage buttons! ;)

This week's A La Card video features inspiration from Kristina Werner of K.Werner Design. If you have not yet met this delightful designer, you are sorely at a loss and I urge you to check out here blog immediately at http://www.kwernerdesign.com/blog !
I love Kristina's simplistic style and funky color choices; her designs are eye catching and feasible to accomplish with a minimal amount of time and supplies. I myself am not such a simple gal, so trying to create a project inspired by her style was a stretch, but it was a BLAST!
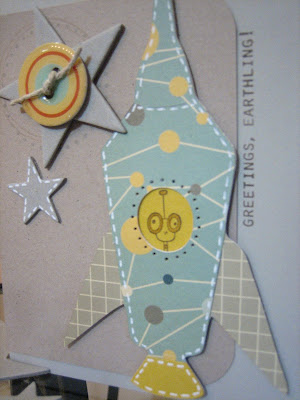


Please check out this week's A La Card Video: Inspired by K. Werner Design, and let me know what you think!


*HUGS AND HOOTS*
<3 Alicia

Saturday, November 7, 2009

A new bewitching video!

Hello Friends! I am just a wee bit late on wishing you all a Happy Halloween, but seeing as how it is my very favorite holiday, I was so wrapped up in my celebratory festivities, I didn't get around to editing my latest video set in time for the 31st!
I am super excited to share this tutorial set with you as the technique and the project can be used year-round and are both quite versatile!
The pictured banner below was my attempted contest entry for the Gypsy contest, but to make a long story short, I missed the deadline time due to time differences and was unable to enter. Once I found out that I'd missed it, I spruced it up a bit more with a few additional carts to make the end cap pendants cuter.

Now that the newest Gypsy updates are available, it seems I will have my hands full over the coming weeks re-doing some of my previous videos, as the newest added features make things like word books so much easier to accomplish! With the first trimester of the school year coming to a close, October was a busy month for me, but I am hoping to be able to make videos more frequently for you over the coming weeks, so keep checking back for updates, friends! :)

And without further babbling, I present to you, today's video set:
Technique: Creating Shadows
Project: Banners

Part 1


Part 2


If you create a banner yourself, I'd love to see it! Please share your creations by e-mailing attachments to me at scrapperbug2002@yahoo.com, or leaving a link from my comments page here; I will feature any projects you share on my blog so others can see what variations you all come up with!
I hope you all have a fabulously wonderful weekend!

Hugs and hoots,
Alicia

Saturday, October 10, 2009

I love boys who *SPARKLE*!

This card makes my heart swoon as much as Edward, himself does! This little locket card was a serious labor of love; you know, the ones that you work on just a little bit more each day, 15 minutes at a time. It all started with a few twilight stamps finding thier way to my home, them some Dazzling Diamonds from SU!, and a set or two of the scalloped nestabilities; once joined by a healthy serving of prismacolor markers and Copics, I was doomed!


The front of the card features Stampin' Up! and KI Memories papers, Prima flowers, stamps by Artful Inkables (colored with Copics), a lace heart cut from my Cricut and the Storybook cartrif=dge, a Heidi Swapp photo corner, KI Memories Ribbon, and an SU! Build-A-Brad. I created the locket in the center using the scalloped and oval nesties.


I have been building a Twilight-themed stapin arsenal, and teh real trouble began with this little buy from The Greeting Farm, named Edward. I colored him using a combination of Copics and prismacolor markers and added his dazzle with Dazzling Diamonds and 2-way glue from Stampin' Up! How adorable is he?!


This card was totally meant for my sister, as a JUST BECAUSE card, but I may have to keep it for myself....perhaps it will adorn a scrapbook page of the Midnight Release of New Moon next month instead? I also decorated teh inside of teh card, it says "Look after my heart-I've left with you," whihc is a quote from the book, turned into a stamp again, from Artful Inkables.

I hope you've enjoyed this bit of eye-candy as much as I have! I may have to do a tutorial on the locket design sometime soon, but it is fairly straight-forward!

Sweet Dreams!
*HUGS AND HOOTS*
<3 Alicia

Friday, October 9, 2009

New and Improved!

I am SUPER excited to share my latest videos with you, but am laughing at myself over my "operator error". You have to watch Part 1 to see what I am talking about, but I know you will laugh as soon as you hear! My finace and I are still smacking our foreheads over it! Perhaps a V-8 would have done me some good!

We have another busy weekend planned!It seems the school weeks are flying by, but in turn, my weekends soar past me without much time for vegitating. I am thinking like a carrot tonight, that is for sure! I am hoping to get in some time designing, grading this week's tests and writing from my second graders, and maybe an episode or two of Supernatural(I LOVE Paranormal entertainment!<3) with Christopher before he's off to work.

I will say, I am looking forward to more fun with the mouse tomorrow at Disneyland, but I hope I am not too tired! My BFF says the Halloween Fireworks are amazing, so i will have to get back to you on that!

In the mean time, here are this week's videos! Part 1 features welding, first with letters, second with images inside a frame. Part 2 follows the assembly of a 12 x 12 scrapbook page with the items created from part 1.
Enjoy!


Have a fabulously crafty weekend, all!
*HUGS AND HOOTS*
Alicia

Wednesday, September 30, 2009

Mid-week playdate!

It is certainly way too late for me to be up right now, but I am wired for some odd reason. I have been sick for about 5 weeks now and finally went to the Dr. today. After several scripts, one for Antibiotics, and a chest x-ray, I should be fast asleep, but I'm not! I may as well stop in for some show and tell!
Back in 2007 when PC released their line of Disney dies for their manual die cut machine, I fell in LOVE. I soon fell back down to Earth once I saw how much it would cost me to purchase the entire line. :( *crushed* Randomly enough, I was cruisin' through a few scrappy sites last week and stumbled across a clearance sale...wait for it, wait for it...all of the dies were available except for two (which I have since found elsewhere) for $3.99 instead of $16.99 each! Naturally, I had to scoop them all up! I was worried that the combination dies, which must be cut out and then embossed, would be tricky, but they weren't at all!
This is a layout of firsts: my first time using my new dies and my first title cut with my new G.

This layout is about how much I enjoy going to Disneyland on week nights with my fiance. It is SO much fun to go to work, finish prepping and take off for a sweet little date with Christopher. We are such BIG kids! I especially love having all of the extra time while waiting in line to chat about my day and talk about random bits of life with him.
My favorite thing about this layout is the office-feel. I have included the school-related items from the line and have made it seem as though Mickey is luring Minnie away from her work...which he is, using the die cuts. I completely despise chalk boards, but they sure are cute! I used a wooden photo frame die cut to make the boards here to hold my journaling. Here are a few more detail shots of the office supplies and such:


On another note, I want to also tell you that I've designed a really fun card based on some online inspiration and so I hope to make a new video for you all this week...so be on the look-out!

I better take my sickly self to bed and get some rest!
Have a happy Wednesday, everyone!

Monday, September 28, 2009

Or maybe that is falling with style?

Can I just tell you how stinkin' excited I am? I have wanted to start a blog with video tutorials for quite some time now and I am so happy to be able to create a place where I can share what I love doing with all of you. I want to thank the gals over at the Cricut Message Board for encouraging me to take the leap; let's see if I can fly!


My fiance, Christopher, and I just purchased Annual Passes to Disneyland (about a 45-60 minute drive from here) and we are just ECSTATIC! We have had them for less than a month and we have already used them about 8 times! LOL Keeping this in mind, I have started to scrap all of our Disney pics and after printing them out to date, we have over 700 pictures from the mouse house over the last four years...YIKES! Regardless of whether or not I ever "catch up" on any of those, it has been so much fun looking through them and scrapping them. I thought I would share a layout with you that I completed recently using the new EDPD cartridge. I had so much fun dressing these dolls up to look like Christopher and I! I even stamped a few graphic-style swirls on his t-shiurt, becuase so many of his shirts have that sort of pattern to it and I don't have any itty bitty Greek letters to do his fraternity letters in (Sigma Chi). Speaking of which, I am an Alpha Phi Alumni...any Phis out there? AOE!


I hope that you subscribe to my blog and my youtube channel, which can be found at http://www.youtube.com/scrapperbug2002 so that I can share various papercrafting tutorials with you!

I can FLY!